 Welcome to the third and final part of my Linux VDA on CentOS 6.6 Blog series… (Nearly there!!!) If you have just stumbled across this post and would like to go back and review what has come before just click on these links: Part 1 – Installing and preparing the Linux OS and Part 2 – Installing and configuring the Linux VDA. Once again, I hope you enjoy the final part in the series and, as always, please sound off in the comments if you have any questions or feedback.
Pt.3 Delivering Linux Shared Hosted Desktops
1. Updating Site Controllers
Copy the Update-BrokerServiceConfig.ps1 script file to the root of the first Controller – C:\
Note: The above ps1 script file is located inside the citrix-linuxvda-scripts-1.0.0.zip file available under the Linux Virtual Desktop 1.0 download page on citrix.com/downloads: Linux Virtual Desktop 1.0 (scripts)
Launch a local instance of PoSH on first Site Controller
Manually load the FMA (XA/XD) service snapin’s (SDK)
– Type asnp citrix* and hit return
Note: To create a customized PoSH profile and save yourself from having to consistently & manually load the FMA snapin’s, modules etc. then take a quick look at one of my earlier blogs in the general @XDtipster series:
@XDtipster – Creating A Customized XenDesktop PoSH $Profile
– Run Update-BrokerServiceConfig.ps1
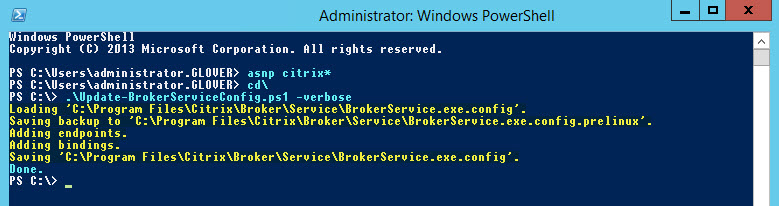
Note: Per the above output: the script file updates the BrokerService.exe.Config file located under C:\Program Files\Citrix\Broker\Service with the required WCF (Windows Communication Foundation) endpoints and bindings required by the Linux VDA, with a copy (with .prelinux appended to the file name) of the original config file being taken and placed alongside the updated version.
IMPORTANT: Repeat the above actions on all remaining Site Controllers
2. Create a Machine Catalog
– Launch Citrix Studio
– Right click on the Machine Catalogs node > Select Create Machine Catalog
– Click Next on the initial welcome screen
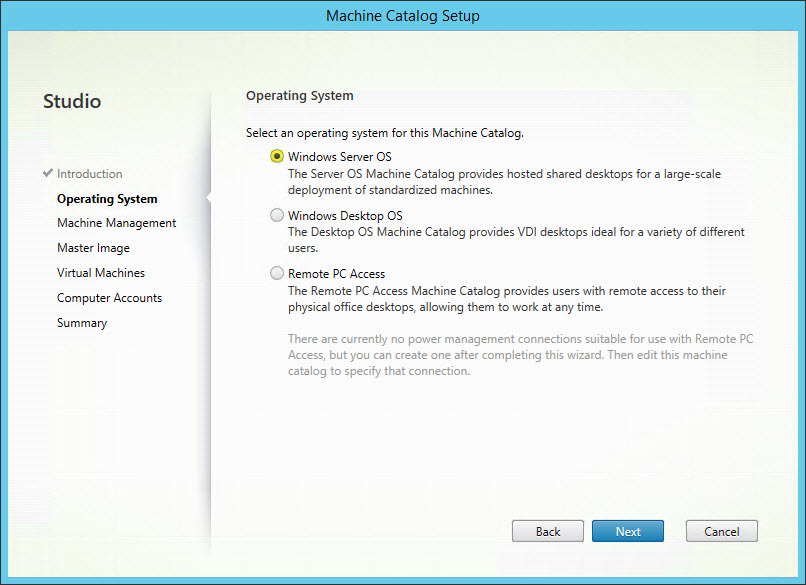
– Select Windows Server OS
Note: At this time, Citrix Studio does not yet support the concept of a “Linux OS”; however, selecting Windows Server OS here implies an equivalent shared desktops delivery model. The Windows Desktop OS option implies a single user per machine delivery model, which is not applicable to Linux VDAs therefore even when using “Desktop” Linux distributions, the Windows Server OS option must be selected.
Above note taken from the Red Hat Installation Guide
As PVS, MCS and Power management are not supported for Linux VDAs (v1.0 as per XA/XD 7.6 FP2) at this time, select the following Machine Management options:
– Machines that are not power managed
– Another service or technology
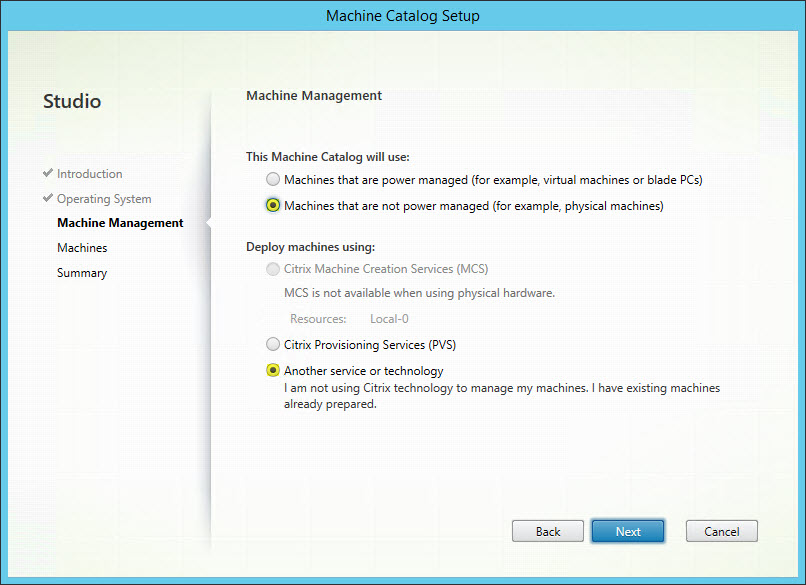
– Click Next
– Add the CentOS VM & AD computer account and ensure that 7.6 is selected as the VDA version
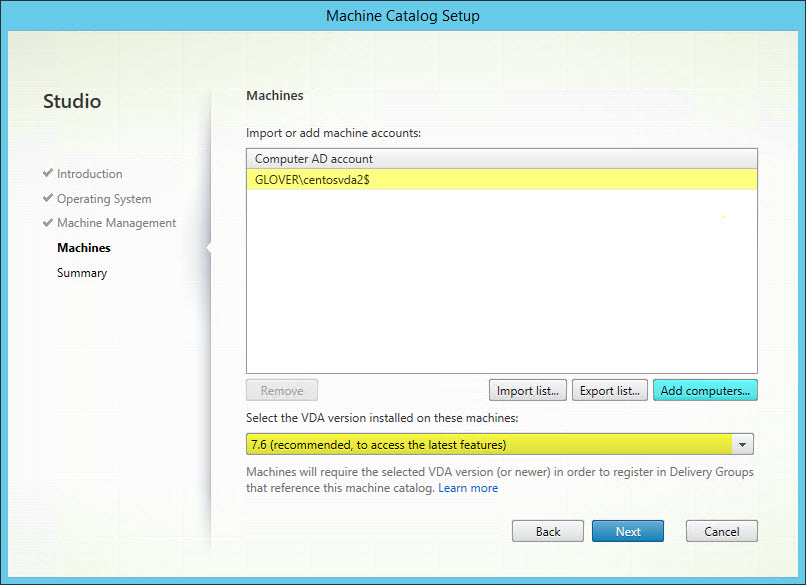
– Click Next
– Name the Machine Catalog appropriately and click Finish
3. Create a Delivery Group
– Right click on the Delivery Groups node > Select Create Delivery Group
– Click Next on the initial welcome screen
– Add the available CentOS 6.6 machine and click Next
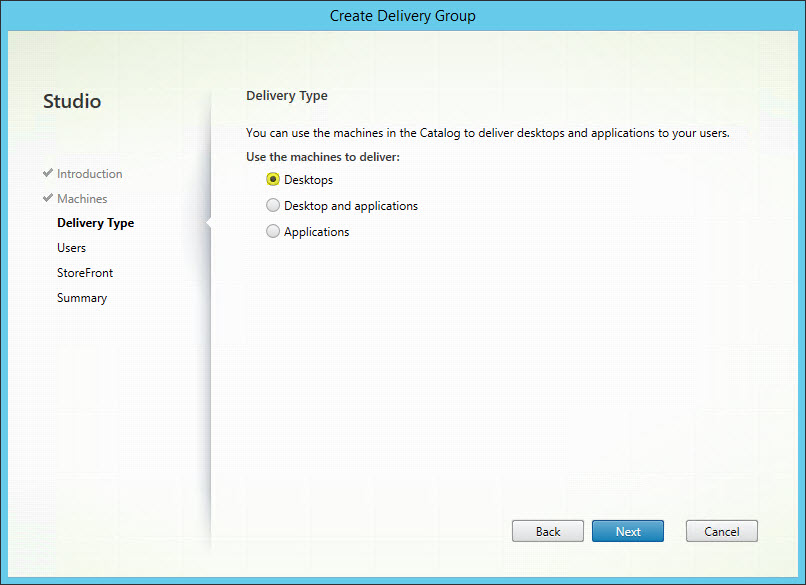
– Select Desktops as the Delivery Type and click Next
Note: At this current time, Linux VDA machines do not support application delivery and therefore the Delivery Type must be set to Desktops
Above note taken from the Red Hat Installation Guide
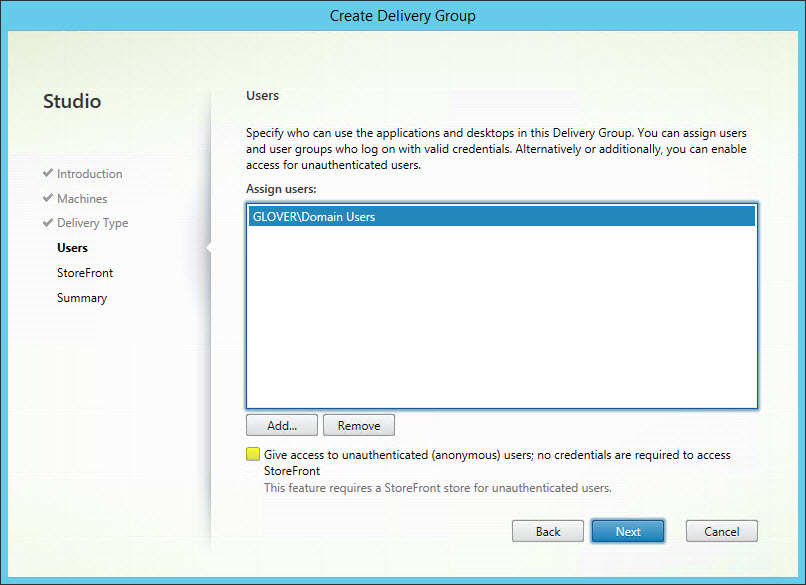
– Add the Users you wish to give access to the CentOS Shared Hosted Desktop and leave the option to give access to unauthenticated (anonymous) users unticked; click Next
– Click Next to configure StoreFront/Receiver integration manually at a later time
– Name the Delivery Group appropriately and click Finish
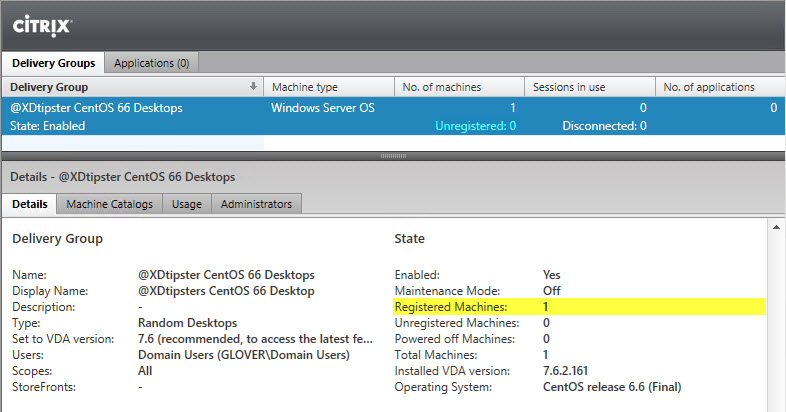
- Confirm Registration
Once the CentOS 6.6 Machine has been added to the Delivery Group, you may need to wait a maximum of 2 minutes for the VDA to successfully register with the defined site Controller as defined by the VDA configuration script (ctxsetup.sh) in part 2 of this blog series. The reason for this being, at the time of VDA configuration, the defined site Controller i.e. dc76.glover.com, was not configured correctly with the new endpoints and bindings required to support Linux VDA registration and therefore previous registration attempts would have been rejected out of hand by the site Controller.
Note: Once an initial registration attempt (7-10 seconds post Citrix Desktop Service start-up) is initially rejected, further attempts would continue until the internal doubling wait-time algorithm reaches the maximum ceiling of 2 minutes, culminating in consistent and on-going registration attempts every 2 minutes indefinitely.
Refresh Citrix Studio occasionally until registration is confirmed as per the screenshot below:
Note: If registration takes longer then expected. Review the VDA configuration step in part 2 of this blog series and/or restart the VDA services to re-initiate communication with the updated Site Controllers:
service ctxvda restart
or
sudo /sbin/service ctxvda restart
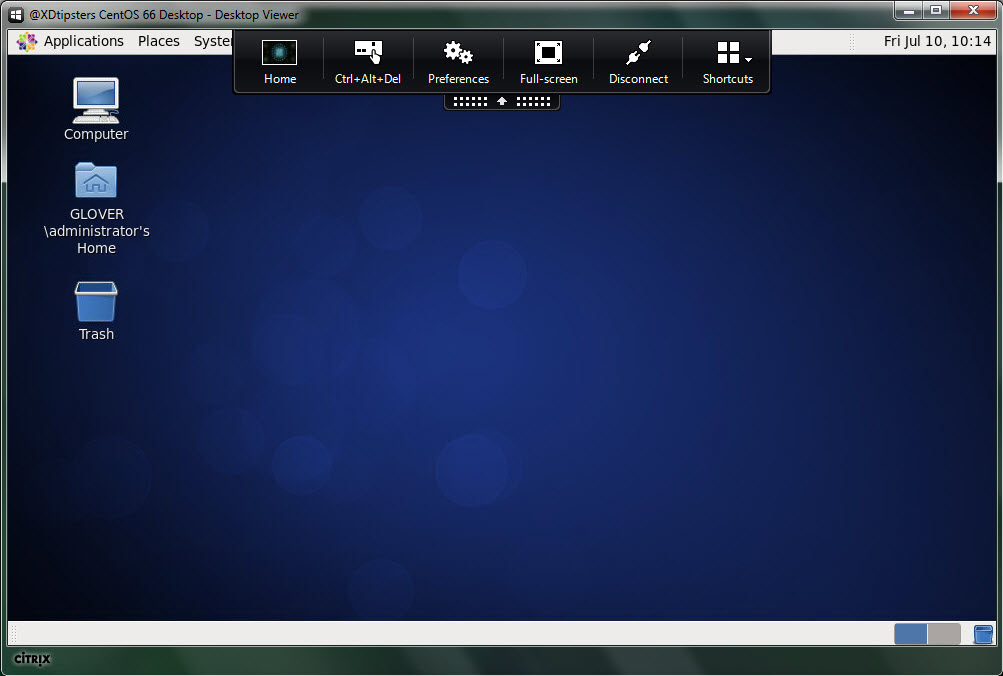
4. Confirm successful launch and connection to the CentOS Shared Hosted Desktop over ICA/HDX
Once StoreFront is configured appropriately, login and launch your CentOS 6.6 Shared Hosted Desktop:
Well there you have it… My three part Blog series on the Linux VDA setup on CentOS 6.6. I hope you enjoyed reading and following along.
Finally, I would just like to re-iterate once again that this blog series focuses on a currently unsupported Linux Distro and is not intended to replace the current Linux VDA installation guides found on docs.citrix.com
Installation guide for Red Hat
Installation guide for SUSE
Note: You need to review these btw as they contain loads of extra info including troubleshooting tips, VDA un-installation instructions etc…
Instead, this is my attempt to help supplement the official documentation and keep things STREET for all the RTFM generation out there, of which I proudly consider myself to be a member of.
Until next time… Keep it FMA!!!
Best Regards,
Mick Glover (aka XD Tipster “Rocking XenDesktop since 2008”)
Senior Readiness Specialist,
Worldwide Support Readiness [EMEA]
Citrix Systems, Inc
Follow @xdtipster